How to Make a Dog Collar for Under $5: Easy DIY Guide
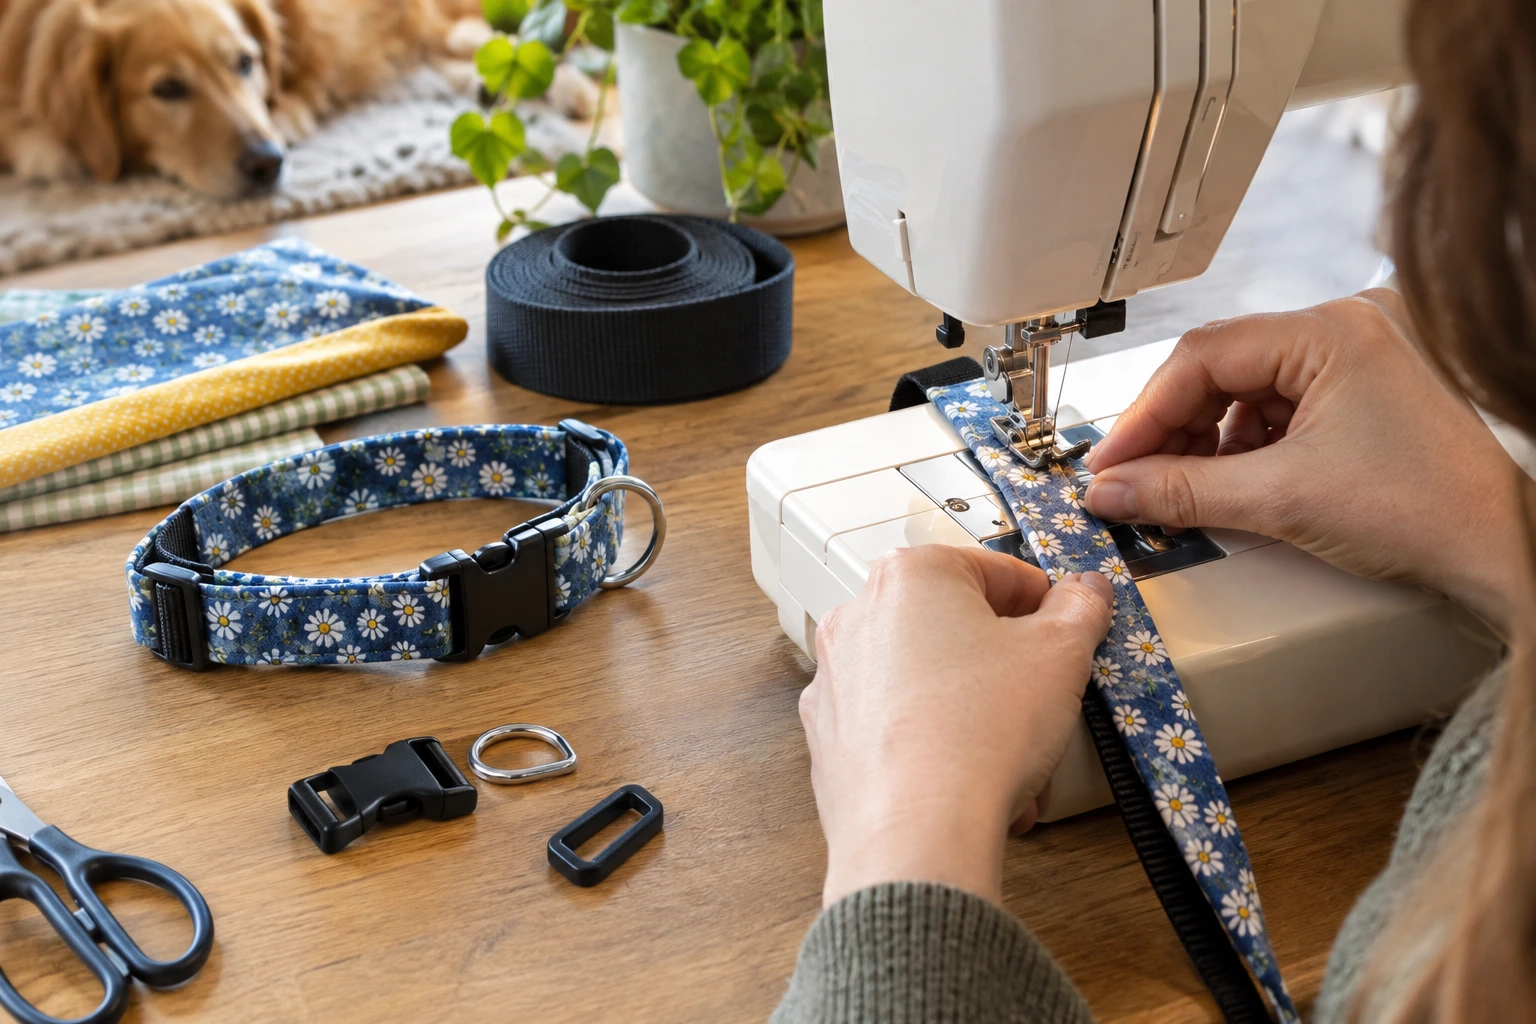
Learning how to make a dog collar at home takes about 30 to 45 minutes and costs a fraction of a store-bought designer collar. The construction is simple: a strip of cotton fabric wrapped around nylon webbing for strength, then assembled with three pieces of hardware. Any sewing machine handles it, and the fabric choice is completely yours.
What Do You Need to Make a Dog Collar?
Fabric. A quarter yard of 100% cotton is enough for most sizes. Quilting cotton works well and washes easily.
Nylon webbing. This is what actually carries the load. Match the width to your hardware, typically 5/8 inch for small dogs, 1 inch for medium, and 1.5 inch for large breeds.
Hardware set. A side-release buckle, a tri-glide slider for adjustment, and a D-ring for the leash and tags. Buckle kits sell for a few dollars and often make several collars.
Polyester thread. Stronger and longer-lasting than cotton thread under repeated tension.
Tools. Sewing machine, iron, fabric scissors, measuring tape, and binder clips. Pins leave holes in webbing, so clips are the better choice.
Measuring Your Dog for the Right Length
Wrap a measuring tape around your dog’s neck where the collar will sit, sliding two fingers underneath so the fit isn’t too tight. That number is your neck measurement.
For your cutting length, add 12 inches to the neck measurement. The extra accounts for the fabric that wraps around each piece of hardware plus the adjustment range. Our dog collar sizing guide covers measuring in more detail.
Cutting and Pressing the Fabric Casing
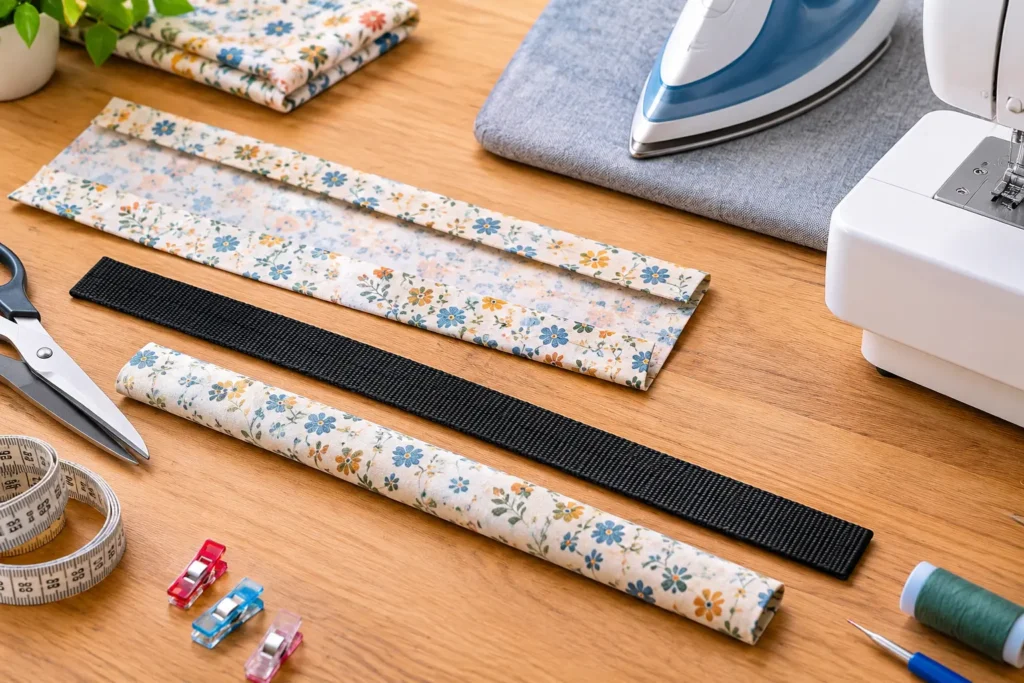
Cut one strip of fabric 3.5 inches wide by your final measurement and one length of nylon webbing to match. Burn each webbing end briefly with a lighter to stop fraying.
- Fold the fabric strip in half lengthwise, wrong sides together, and press.
- Open it back up, fold both long edges in toward that center crease, and press again.
- Fold the short ends in about 1/4 inch and press.
- Fold the strip in half lengthwise one final time so the pressed edges line up.
You now have a fabric casing with all raw edges hidden.
Encasing the Webbing
Open the final fold and lay the nylon webbing inside so it sits neatly within the fabric. Clip it in place along the length.
Sew all the way around, about 1/8 inch from the edge, on both long sides and both short ends. At the corners, leave the needle down, lift the presser foot, pivot, and then continue. This locks the webbing inside the fabric and closes the casing in one pass.
Important: don’t iron the fabric once the webbing is inside. Nylon melts under a hot iron.
Assembling the Hardware in Order
The assembly sequence matters more than anything else in this project. Getting a piece on backward means unpicking stitches.
- Thread through the tri-glide slider. Feed one end of the strap through the slider, fabric side facing out, and pull about 2 inches through.
- Stitch that tail down. Sew a small square with an X through the center for strength.
- Add one half of the buckle. Feed the free end through one side of the side-release buckle.
- Return through the slider. Bring that same end back through the tri-glide, which creates the adjustable loop.
- Add the D-ring and second buckle half. Slide the D-ring on, then the remaining half of the buckle.
- Fold and secure the end. Fold about 1.5 inches of strap over so the D-ring is captured in the fold, then sew two reinforced lines across to hold it.
Reinforce every stress point with two to three passes of stitching. These are the spots that fail first if the dog pulls.
Upgrading a Cheap Collar Instead of Starting from Scratch
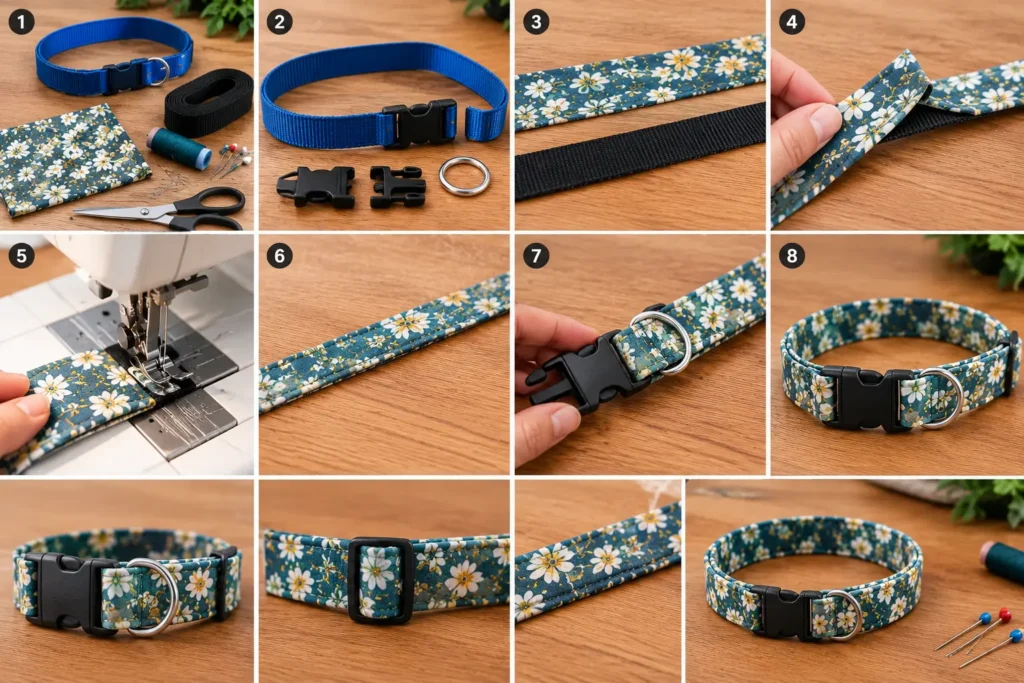
If sewing through nylon webbing feels like too much for your machine, buy an inexpensive collar, seam-rip it apart, and slip the existing webbing into your fabric casing.
One check before you buy: make sure the collar is sewn together, not glued. Glued collars require cutting away too much webbing, which leaves the finished collar too short.
Fit and Safety Checks Before Your Dog Wears It
Before the collar goes on for real, tug hard on every stitched joint, especially where the D-ring is anchored. That’s the point of carrying the full force whenever your dog pulls against the leash.
Confirm the two-finger fit at the adjusted position, and check the buckle clicks fully closed and releases cleanly. If your dog is a strong puller, our dog collar vs. harness comparison covers when a harness is the safer daily choice regardless of how well the collar is built.
Conclusion
A homemade dog collar comes down to three things: measuring the neck and adding 12 inches, encasing nylon webbing inside a pressed fabric strip, and threading the hardware in the correct order. Reinforce the stress points properly, and the finished collar holds up as well as anything off the shelf.
Frequently Asked Questions
Q: How much fabric do I need to make a dog collar?
A: About a quarter yard covers most sizes, and a fat quarter is often enough for a small dog collar. Larger breeds may need to join two strips for length.
Q: What webbing should I use for my dog?
A: Roughly 5/8 inch for small dogs, 1 inch for medium, and 1 to 1.5 inches for large breeds. Your webbing width must match your hardware width.
Q: How long does it take to make a dog collar?
A: Most beginners finish in 30 to 45 minutes, and it drops closer to 15 to 20 minutes once you’ve made a few and know the hardware sequence.
Q: Do I need a heavy-duty sewing machine?
A: No. A standard home machine handles fabric and webbing fine, though a heavier polyester thread and a fresh needle make a noticeable difference on the reinforced sections.
Q: Can I make a dog collar without a sewing machine?
A: Hand-sewing is possible but not recommended for the stress points, since machine stitching holds up far better under repeated leash tension.
Q: How do I know my homemade collar is strong enough?
A: Pull firmly on the D-ring anchor and buckle joints before use. Every stress point should have two to three passes of reinforced stitching, and nothing should shift or gap under tension.